Friday, October 30, 2015

Easy DIY Spider Web Trick or Treat Bags

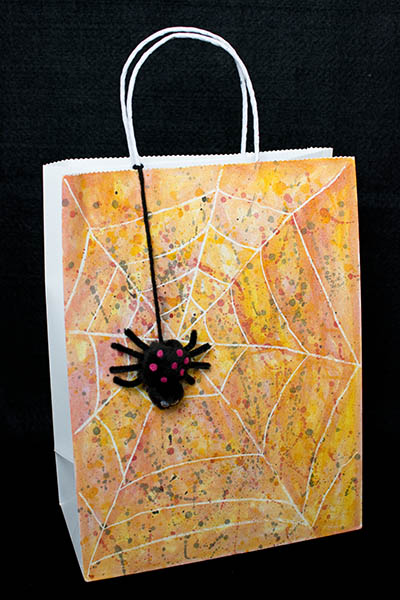
Bright and colorful spider web trick or treat bags with black pom pom spiders dangling over their webs

This blog post is coming out sort of under the wire but I just had to share these quick and easy trick or treat bags that kids can make for Halloween night! I love the idea of hand made trick or treat bags! They can be personalized in so many different ways to match your child's costume or to just have fun with all the great Halloween imagery!

I came up with two designs for a spider web trick or treat bag. The first one is a really fun process art craft using bits of tissue paper and contact paper. This process is used a lot to make pretty suncatchers and "stained glass" art.

Trick or treat bag made with shades of purple and green tissue paper with cute black spider on a white web with large orange letters spelling trick or treat

The second design uses white crayon to create a watercolor resist spider web (here is a spider web craft using oil pastel: Oil Pastel Resist Spider Webs).

Spider web Trick or treat bag made using a white crayon as a watercolor resist with cute black spider with pink spots

To me, the spider is the finishing touch on the trick or treat bags. I love these dangling pom pom spiders because they give the bag some real bounce (and they are pretty darn cute, especially when dressed up a bit!)! If you are pressed for time or don't feel like pulling out the hot glue gun, you could also use spider stickers or cut out a paper spider and glue it to the bag.

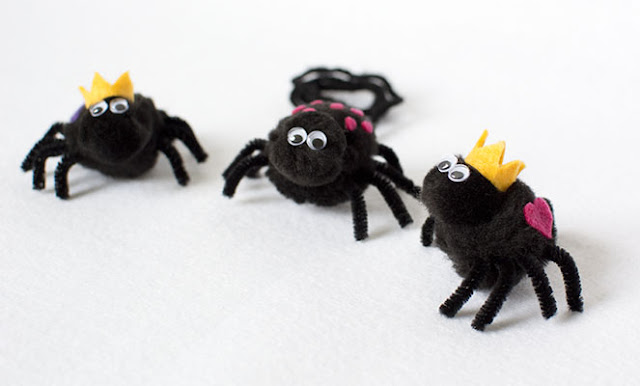
Cute black pom pom spiders with googly eyes and felt embellishments to make crowns, spots and hearts. King queen princess prince spiders

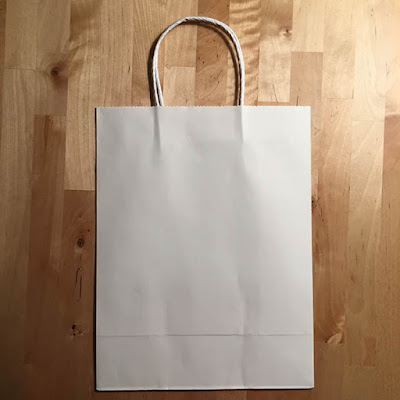
All you need for this project are things you probably already have on hand... crayons, watercolors, tissue paper, contact paper, craft paint, and, of course, a paper bag. I used a plain white one but you can recycle, for example, an old birthday bag if you are making the contact paper bag.

White paper craft bag on light wood table


Watercolor Resist Trick or Treat Bag

You will only need two things for this bag: crayons and a set of watercolors.

White crayon, black and white paintbrush next to a colorful watercolor set

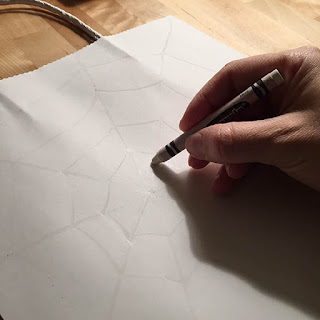
If your kids are very young, you can draw a spider web on the bag with a white crayon. Older kids can draw their own. I used white, but it would also be fun to use other crayon colors or several colors!  Just be mindful of the colors you choose... the beauty of the resist is in the contrast you get by keeping the paint off the areas with crayon (white is pretty much a fool proof color for this technique).

Paint, and paint, and paint until the bag is covered in beautiful watercolors! Layer the paints, splatter them, add some salt, go wild with any watercolor technique you like or can think of! Kids will love seeing the spider web "magically" appear on the bag with each brush stroke!

Drawing a white spider web onto a white craft bag with a white crayonPainting beautiful orange yellow and red watercolors onto a white craft bag revealing a white spider web

Allow the paint to dry and add a spider!

Cute black pom pom spider with pink felt spots on a beautiful orange red yellow and black watercolor background


Tissue and Contact Paper Trick or Treat Bag

This bag is a lot of fun for younger kids or kids you enjoy a more sensorial art process! They will get to rip up tissue paper, toss it onto the contact paper, and pat it all down with as much gusto as they like!

All you need is contact paper, tissue paper in a variety of colors, and some white acrylic craft paint. The paint is for the spider web, but if you don't want to use paint, another option is to cut out a paper spider web in the same way you would make a paper snowflake (Spider Web Kirigami).

Cut out a piece of contact paper slightly larger than the bag.

Colorful shades of tissue paper, contact paper and white acrylic craft paingCutting contact paper to fit a white craft bag

There are a few ways you can attach the contact paper to the bag at the end of the art making process. I opted to fold the contact paper over the edges of the bag to secure it to the bag. Therefore, I needed to cut the contact paper around the hand straps of the bag.

Cutting contact paper down to size around white craft bagWhite craft bag and contact paper

Remove the backing of the contact paper and place it over the bag with the sticky side up.

Paint a spider web on the sticky side of the contact paper (the contact paper was placed on top of the bag so I knew how big I needed to make the spider web). Allow the paint to dry.

White craft bag and contact paperPainting a white spider web on the sticky side of the contact paper

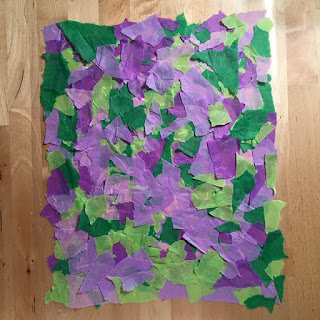
Tissue paper time! Have your kids rip up the tissue paper.

For younger kids, secure the contact paper to a table with a little tape. Sticky side still up, cover the contact paper with the bits of tissue paper.

Beautiful bits and pieces of torn up colorful  tissue paperSticking colorful pieces of torn up tissue paper to contact paper with a white spider web painted on it

Pat all the tissue paper down to make sure it is all sticking to the contact paper.

Secure the contact paper to the bag. As I mentioned before there are several ways to do this:

  • Use the excess contact paper around the border to fold it over onto the bag (this is what I did and could probably be done successfully with older children. You just have to leave some free space -- no tissue paper -- around the edges of the contact paper).
  • Cut the contact paper down to size and tape it onto the bag around the edges.
  • Cut the contact paper down to size and spread glue all over the tissue paper and glue it to the bag.
The 2nd and 3rd options are easier when doing this project with younger kids because they will cover every inch of the contact paper with tissue paper.

Colorful pieces of torn up tissue paper stuck to contact paperTrick or treat bag made with shades of purple and green tissue paper with a white painted spider web

Add the spider and maybe some letter stickers!

Attaching a cute black pom pom spider with googly eyes to a trick or treat bag

Trick or treat bag made with shades of purple and green tissue paper with cute black spider on a white web with large orange letters spelling trick or treat


Pom Pom Spiders

For the pom pom spiders you will need one pipe cleaner (chenille stem), one large pom pom (spider's body), one small pom pom (spider's head), googly eyes, and a piece of yarn or string. You can also use bits and pieces of left over felt to make any additional embellishments to fancy up the spider.

Black pom poms, black pipe cleaner chenille stem, googly eyes

Cut the pipe cleaner into 8 pieces of equal length. These are the spider's legs.

Taking the big pom pom, open up it up and apply hot glue to that area. Push 4 of the legs into the hot glue and close up the pom pom, giving it a gently squeeze. Repeat on the opposite side.

Black pom poms, black pipe cleaner chenille stem, googly eyesattaching pipe cleaner chenille stem legs to black pom pom

The spider's body is ready!

Apply some hot glue to the small pom pom and attach it to the body.

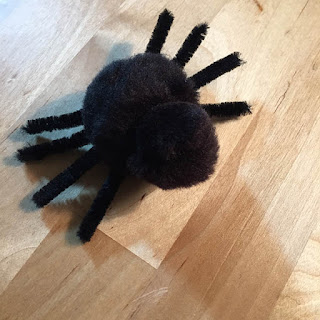
black pom pom spider body with legscute black pom pom spider

Glue on the googly eyes.

If you like, add some felt embellishments.

cute black pom pom spider with googly eyesCute black pom pom spider with pink felt spots and googly eyes

Open up the pom pom at the spider's bottom. Apply a dot of hot glue to it and glue the yarn or piece of string in place. Close up the pom pom and give it a gently squeeze.

Attaching black yarn to cute black pom pom spider with pink felt spots

The spider is ready for its web!

Cute black pom pom spiders with googly eyes and felt embellishments to make crowns, spots and hearts. King queen princess prince spiders

Cute black pom pom spiders with googly eyes and felt embellishments to make crowns, spots and hearts. King queen princess prince spiders

Have a very happy and safe Halloween!!!

Monday, October 26, 2015

Free Printable Emoji Pumpkin Tags for Halloween

Collage of different uses for Halloween tags

While putting together some Halloween goody bags I decided to make some cute tags to wish every one a Happy Halloween. I had a lot of fun coming up with silly and emoji-inspired pumpkins! I loved the way they came out and I wanted to share them as a free printable* available for download here.

Collection of 9 emoji pumpkin tags for halloween to download and print

The PDF document has nine 2 in. x 3 in. (5.08 cm x 7.62 cm) tags. Just download, print, and cut them out!

5 happy halloween emoji pumpkin tags on a black background with orange confetti

They can be used as tags for Halloween goody bags. Just punch a hole at one end, write a message, and attach to the goody bag with a twist tie or string! I used a silver metallic Sharpie on the black tags and a black Sharpie on the white ones.

Halloween goody bags with pumpkins and ghosts on a black background lit by a tea candle with two crossbones

Halloween goody bags with pumpkins and ghosts on a black background lit by a tea candle with two crossbones

They can also be used as address labels for some Halloween correspondence!

White envelope with smiling pumpkin return address label surrounded by a green address book and a book of American flag forever stamps

Or as table place cards for a Halloween party!

Halloween table decorated with a black table cloth, spider web and plastic black spiders, bright orange pumpkin and pink, orange and yellow confetti. Crackled glass dish with a black place card tucked into a white napkin. Halloween table decorated with a black table cloth, spider web and plastic black spiders, bright orange pumpkin and pink, orange and yellow confetti. Crackled glass dish with a black place card tucked into a white napkin.

Halloween table with crackled glass plate, silver utensils, and a black place card with a pumpkin illustration tucked into a folded white napkin.

Or they can be slipped into a lunchbox with a sweet note to brighten a special some one's day!

Halloween lunchbox note tucked into the top of a black and white paisley lunchbox next to a silver thermos and a bright green apple all on a dark black background.

Terms of Use: This free printable is for personal, non-commercial use. Feel free to print it as many times as you like and definitely pass the link along to friends and family! Do not sell. Please, contact me with any questions.

Thursday, October 15, 2015

I'm on Instagram!

I love Instagram! Lately I've been getting into a more consistent posting schedule and I'm really getting a kick out of it! I love that I can share things that often don't work too well as a blog post. I use Instagram mostly for:

Illustrations and sketches 
Ink drawing of a mermaid swimming in circles

Close up of yesterday's mermaid sketch!


Very happy and excited bee drawing

A slightly over excited bee for a lunchbox tomorrow! 


Brightly colored mandala on black background

So my daughter just got a new box of @crayola crayons... 

She's bouncing around playing and I'm the one having fun drawing!


Pencil drawing sketch of sleeping basset hound

Sleepy basset hound sketch


Happy green frog and goldfish painting in watercolors

I had a little mommy quiet time this afternoon while my daughter

played! These two appeared on my paper to keep me company!


Ink drawing of a dog chasing a ball with its tongue sticking out

Go fetch!


Works in progress
Work table with paints, paintbrushes, pencil and cut paper along with light green Volkswagen Beetle made out of paper
Working on a new paper illustration!

White horse head made out of felt with white yarn for a mane

Working on something new for the blog!


Craft projects
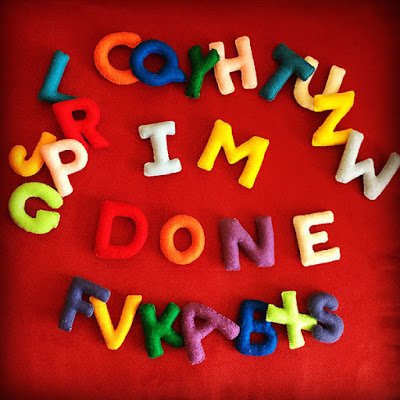
Stuffed felt letters in a variety of colors spelling out I'm Done on a red background

I'm done!!!! I can't believe I finally finished this stuffed alphabet 

for my daughter! I think I've been working on it for almost 2 years. 

Today I decided to get X, Y and Z done. Yay!


Turkey made out of pine cone, twigs and colorful fall leaves

We collected a bagful of fall goodness on our walk this morning.

Then we got to playing around with them and this wacky turkey appeared!


Acorn painted like a candy skull (Dia de los Muertos)

Still playing around with our nature haul from this morning!

Painting Candy Skull acorns!


Blog updates
Little girl dressed in a flowing blue tutu gracefully steps over a rock

I'm sharing a tulle tutu tutorial on the blog today because 

every little girl needs a tutu!


Handmade telescope craft with black cards labeled with constellation names

Today on the blog I'm sharing a telescope craft for learning 

about the stars and constellations!


Other snippets from our days
Sitting West Highland White Terrier wearing a crown of pink roses and green flowers

He's such a good sport! Love him to bits!! (National Dog Day)


Two dried four leaf clovers resting on wax paper

I found a four leaf clover yesterday!!! I'm pressing it along with the

one I found in 2013 (my first ever!). I'm thinking about putting them

in a pendant once my new one dries out.


Caterpillar chrysalides hanging from the top of a clear cup with a drawing of a hungry caterpillar and a flower in the background

Our caterpillars have hardened into chrysalides! I miss the

little munchers already...


If you'd like to follow along, click on @tickledbug or on the Instagram icon in the right hand column! I hope to see you on Instagram!